Introduction | Why | Missions | Tutorial | FIP | Once
|
|
|
| Example flight expand (Part3)
The flight will take longer than originally planned with careful flying, i.e. reducing the RPM, so we extend the mission with a flight plan. Start Prepar3D and open the "ExampleFlight". Select "Flight Planer" in the Navigation menu. Under "Depature: N/A" click Select and in the new window type "LSGS" in the top right input field. Confirm the selection (Sion) with OK. Under "Destination: N/A" click on Select and type "LSGG" into the input field in the upper right corner of the new window. Confirm the selection (Geneva) with OK. Under "Flight Plan Details:" activate the items "VFR" and "Direct GPS". At "Cruising Altitude:" enter 8000.
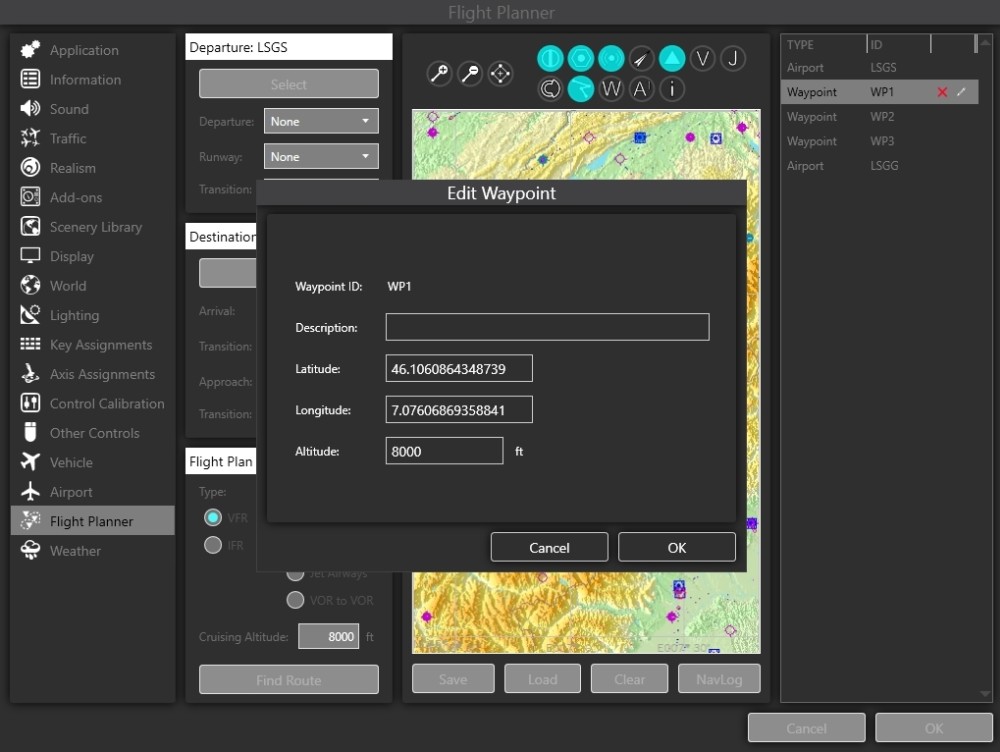
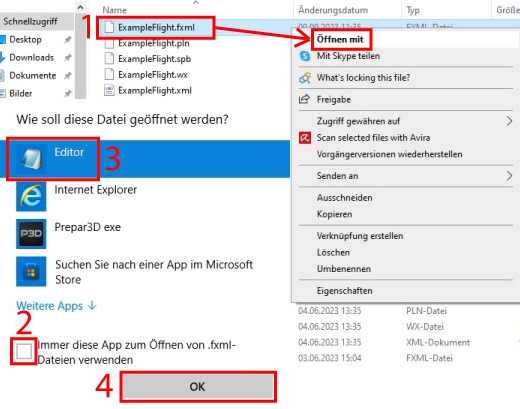
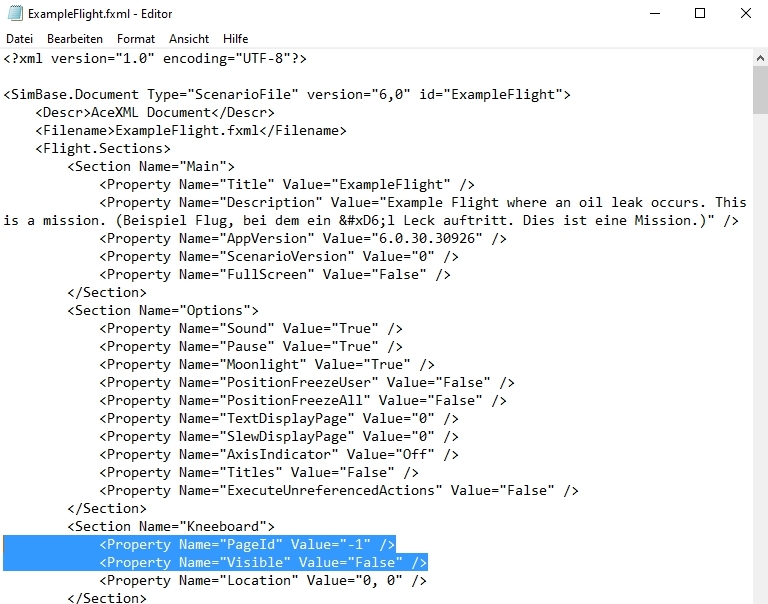
Zoom into the map and click on the map border to bring Sion airport into view. Click on the red GPS line and drag it with pressed mouse button to the valley bend as shown. Create two more waypoints near Lake Geneva this way. Click on "Save" at the bottom. In the new window write "ExampleFlight" for Title and File Name. For Description write "ExampleFlight Sion to Geneva. Now the exact coordinates of the waypoints must be noted. These will be used later in SimDirector to accurately place the waypoints in the mission compass. Open the Flight Planner again, click on the pencil symbol (Edit) at "Waypoint WP1", copy the values of Latitude and Longitude and save them in the "Windows Editor". Click "Cancel" to close the WP1 edit window. Do the same with "Waypoint WP2" and "Waypoint WP3". I wrote it down like this: WP1 WP2 WP3 Now close the "Flight Planner" with a click on OK. Save the flight with the same name as before (ExampleFlight) and exit Prepared. Edit flight file: Now we have to take care of a few entries in the "ExampleFlight.fxml": 1) Open the save directory, by default "C:\Users\USERNAME\Documents\Prepar3D v6 Files" and find the file "ExampleFlight.fxml". Right click on the file and select "Open with". Kneeboard: In the file you just opened, you will find the "Kneeboard" item right at the beginning. - Write in the line <Property Name="Visible" Value="False" /> the word "False" to "True", so the "Kneeboard" will be shown after loading. - By the way, in the line <Property Name="PageId" Value="0" /> you determine which page is displayed. I find the briefing useful at the beginning, so leave Value="0" unchanged. Flightplan: Now you have to scroll down quite far, to the <Section Name="GPS_Engine"> entry. In P3dV4, up to and including P3dV5.3, a "relative path" (to the existing flight plan named "Example Flight.pln") was written at this point. From P3dV5.4 and in first versions of P3dV6 an "absolute path" is written, furthermore every time the flight is saved a new flight plan file is written with the same name as the flight (so "ExampleFlight.pln"). This newly written flight plan is in the same directory as the flight, so a "relative path" would make sense. The problem with absolute path: Therefore the entry must be corrected at this point: Replace "C:\Users\andi20\Documents\Prepar3D v6 Files\ExampleFlight" with "ExampleFlight". ResourcePath: Finally, scroll all the way down to the "ResourcePath". If a mission is saved after loading, e.g. because the user pauses a "10-hour mission" halfway, saves it and wants to continue the flight later, the previously activated triggers and actions are saved in a separate file with the extension ".spb". Since our example mission was not saved "on the way", but already before the actually planned start, this "HintPath" must be removed. Now save the file and exit the editor. Delete additional file: Open the Prepar3D memory directory and delete the file "ExampleFlight.spb". - As long as you don't save the flight again in Prepar3D, the kneeboard stays as set and the ResourcePath doesn't need to be adjusted. - Unfortunately, every time you save in SimDirector, the flight plan is changed back to "absolute path". But this can be ignored until the mission is finished. Only before passing it on to other users, you have to enter the path to the flight plan manually in the "Editor" again. Not much happened in the mission, but here is the zip with the flight plan. Simply copy the files contained in it into the save directory. |
|
|
Continue with part4: Example flight expand (Part4)
|
|
|
I hope you enjoy these flights, if so, please give feedback to p3d@andi20.ch. Also send error messages (spelling mistakes, wrong information, etc.) to me, I appreciate any feedback. |
|
| Introduction | FlightCreate | MissionCreate | MissionExpand | MissionComplete ||||| MissionExpand 1 | 2 | 3 | 4 | 5 | 6 |
Introduction | Why | Missions | Tutorial | FIP | Once


