Introduction | Why | Missions | Tutorial | FIP | Once | Memory | More
|
|
|
| Expand the mission:
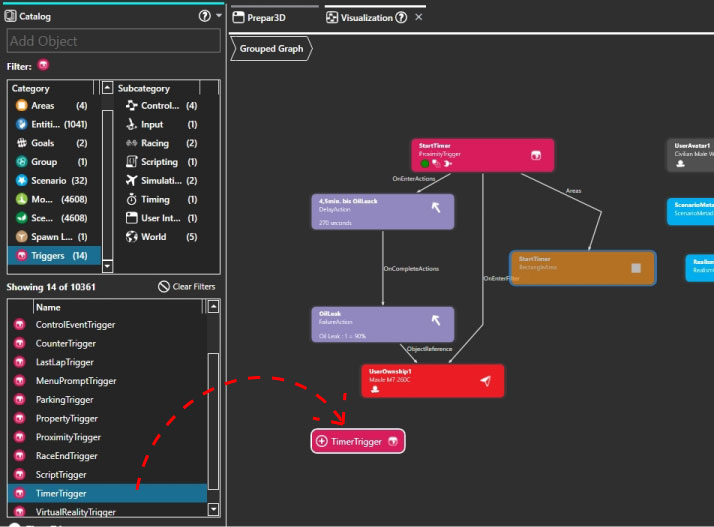
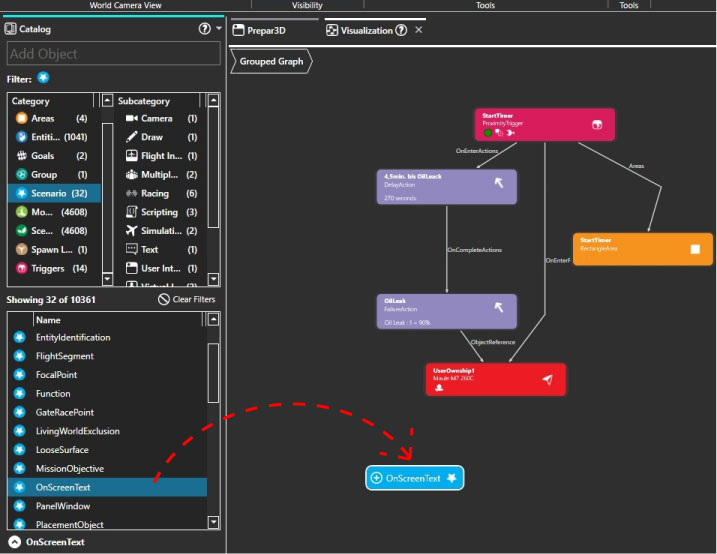
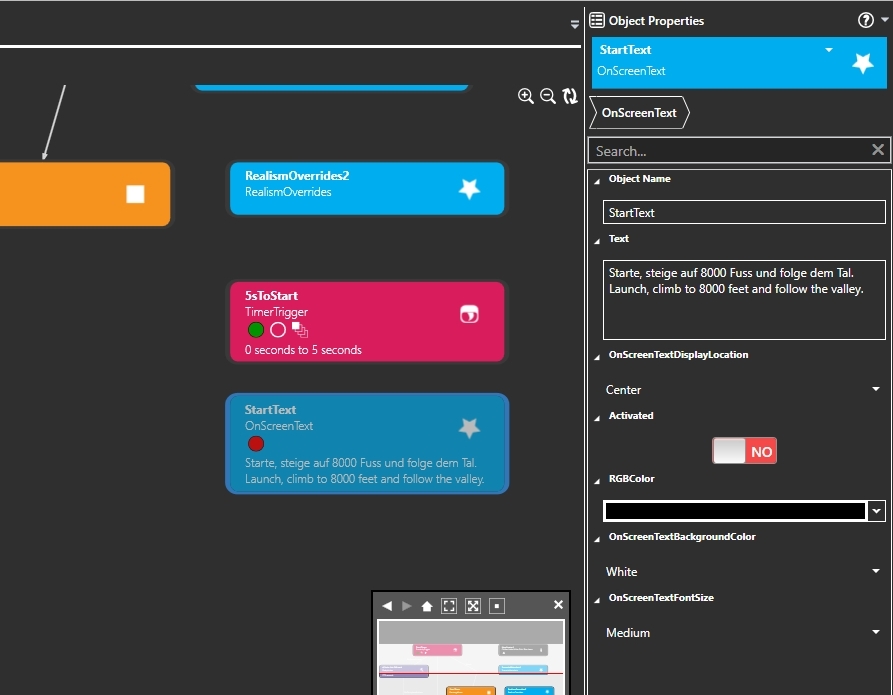
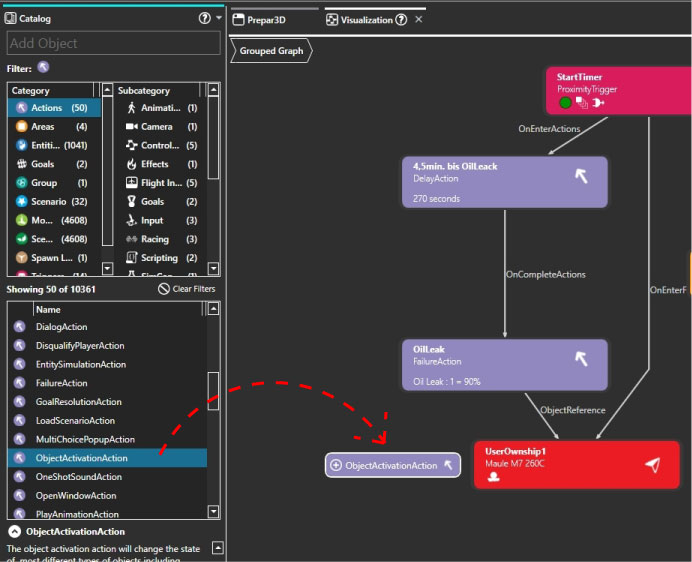
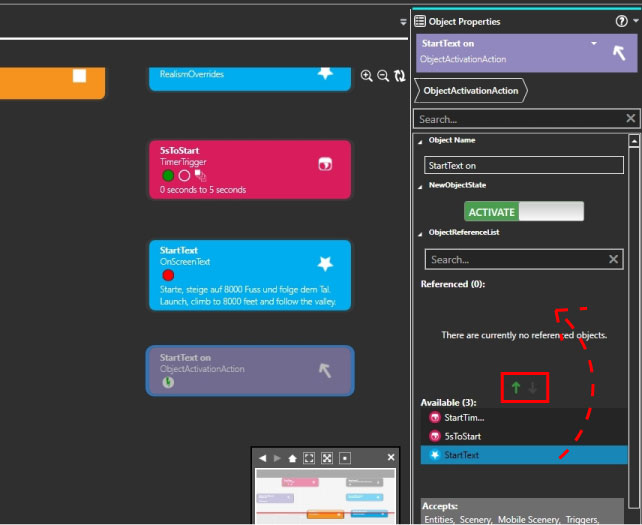
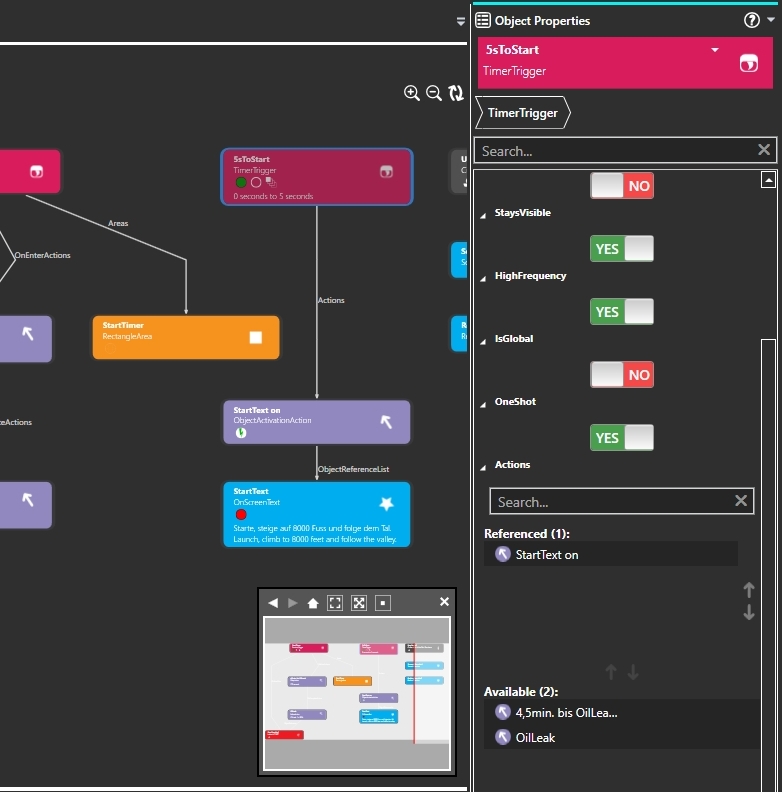
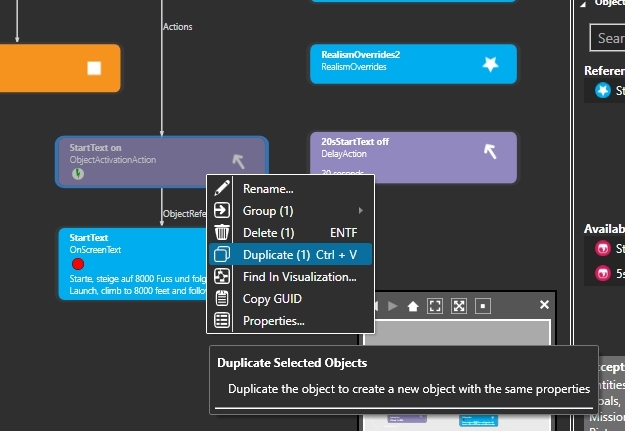
The mission works, but if you want something more comfortable, you can expand this as you wish. First, we hide the area: We start with an introduction text. This text should be displayed 5 seconds after the mission start, so we need a TimerTrigger. Search in the Catalog under "Category" for "Triggers" and in the window below for "TimerTrigger". Drag it into the visualization window with the mouse button held down. Name the trigger under "ObjectName" as "5sToStart". Set "StartTime" to 0 and "StopTime" to 5. Make sure that the trigger has a green dot, i.e. it is activated. Now we create a text. Search for the "OnScreenText" in the catalog under "Scenario" and drag it into the visualization window. In the right window you make these settings: Next the "TimerTrigger" has to switch on the "StartText". For this you need an "ObjectActivationAction", which you can find in the catalog under "Actions". Drag this "ObjectActivationAction" as usual into the visualization window. Name the "ObjectActivationAction" as "StartText on". The "NewObjectState" must be set to "ACTIVATE". At "ObjectReferenceList" look for the "StartText" under "Available" and double click on it. The "StartText" moves up into the "Referenced" area. In the visualization window, find the TimerTrigger "5sToStart" and click on it. In the right window, under "Actions" in the "Available" list, find the "StartText on" action and double-click it. As usual, the action will be moved to the top of the "Referenced" field. In the visualization window you can now see that the "TimerTrigger" triggers the "ObjectActivationAction" after 5 seconds, which in turn switches on the "StartText". Because the text should not stay displayed forever, it must be switched off again. Search for the "DelayAction" in the Catalog under the "Actions" and drag it into the visualization window. Name the DelayAction "20sStartText off" and set "DelaySeconds" to 20. The DelayAction cannot deactivate objects (triggers, texts, etc.), but only start other "Actions". So you need another "ObjectActivationAction". First click with the left mouse button on the "StartText on" action in the visualization window, this action will be selected. Now click with the right mouse button and choose "Duplicate" from the menu. You have created a copy of the existing action, with the same settings, which is called "StartText on - Copy 1". Rename it to "StartText off" and change "NewObjectState" to "DEACTIVATE". At "ObjectReferenceList" you select the "StartText" and bring it into the field "Referenced" with a double click. Next, the DelayAction must be included. In the visualization window, find the ObjectActivationAction with the name "StartText on" and click on it. In the right window, under "OnCompleteAction", find the DelayAction named "20sStartText off" and put it in the "Referenced" field. Now click on the DelayAction named "20sStartText off" in the visualization window and bring the action named "StartText off" into the field "Referenced" in the right window under "OnCompleteAction". If you did everything right, it looks like in this picture: The TimeTrigger activates after 5 seconds the ObjectActivationAction named "StartText on", which turns on the "StartText" and then, via OnCompleteAction, activates the "20sStartText off" Delay. This in turn activates the ObjectActivationAction named "StartText off" after 20 seconds, which switches off the "StartText". It's not that hard once you understand the principle. Save the flight, quit SimDirector and test in the flight simulator. If you don't want to do it all yourself, you can copy the 3 files in this zip into the save directory. |
|
|
Next up: Complete the mission
|
|
|
I hope you enjoy these flights, if so, please give feedback to p3d@andi20.ch. Also send error messages (spelling mistakes, wrong information, etc.) to me, I appreciate any feedback. |
|
| Introduction | FlightCreate | MissionCreate | MissionExpand | MissionComplete ||||| MissionExpand 1 | 2 | 3 | 4 | 5 | 6 |


Introduction | Why | Missions | Tutorial | FIP | Once | Memory | More