Introduction | Why | Missions | Tutorial | FIP | Once
|
|
|
| Complete the mission:
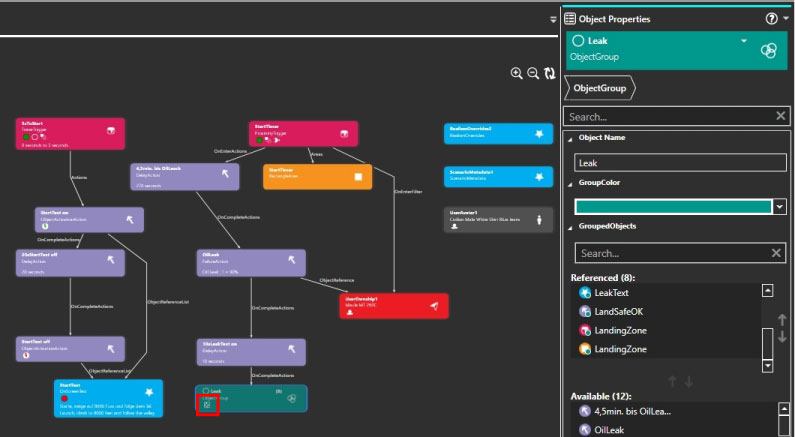
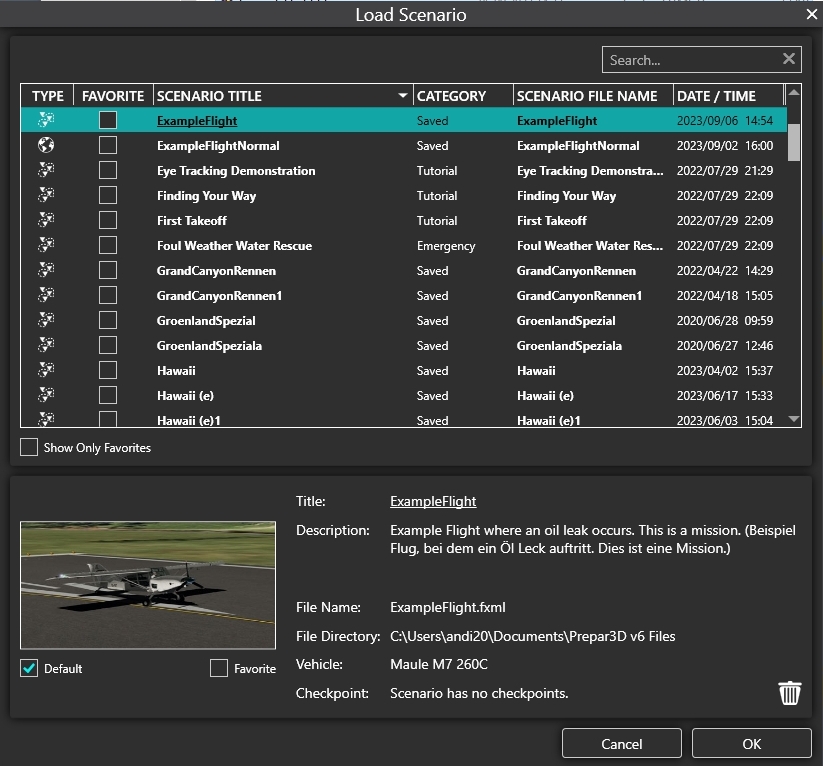
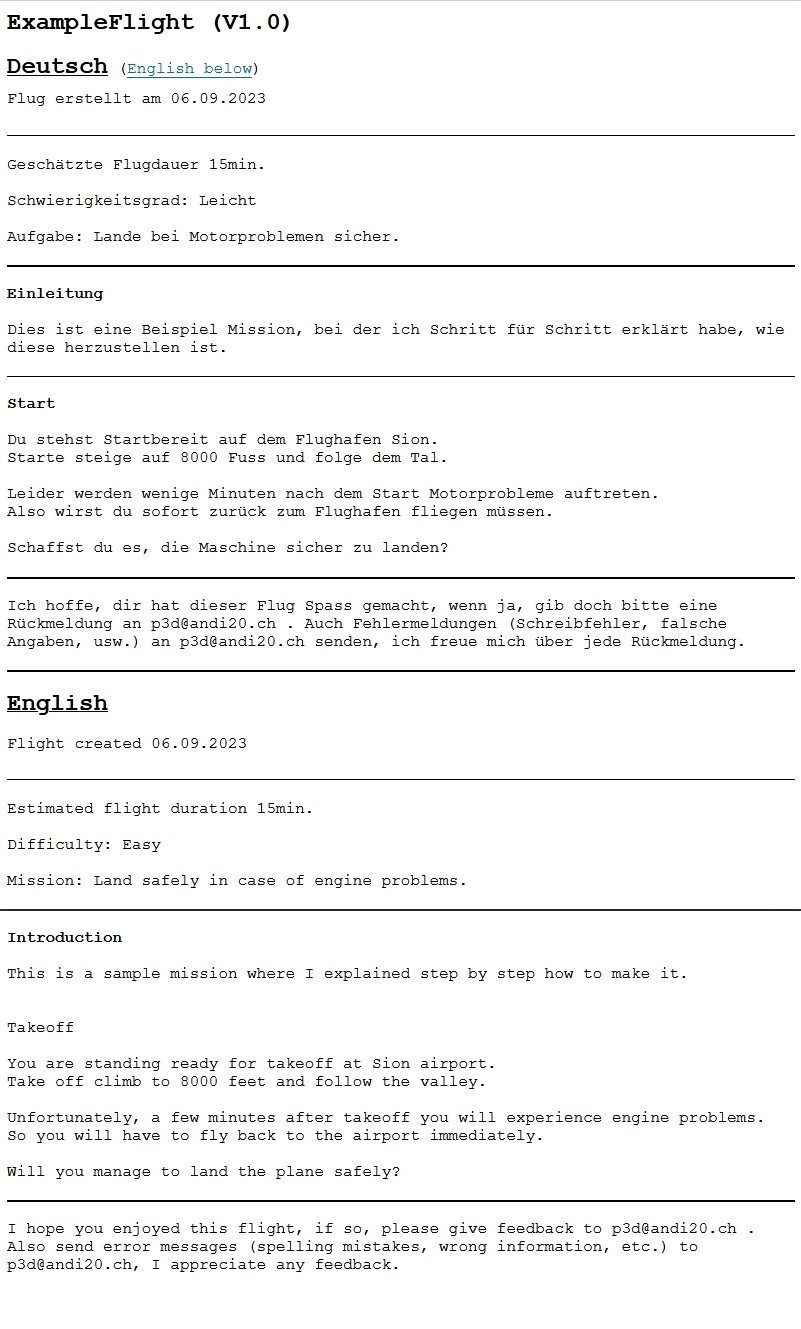
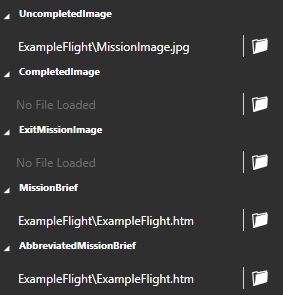
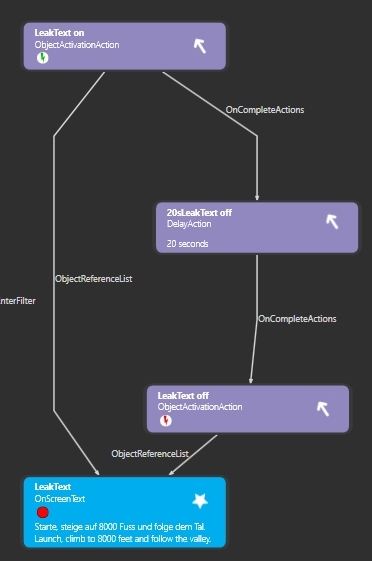
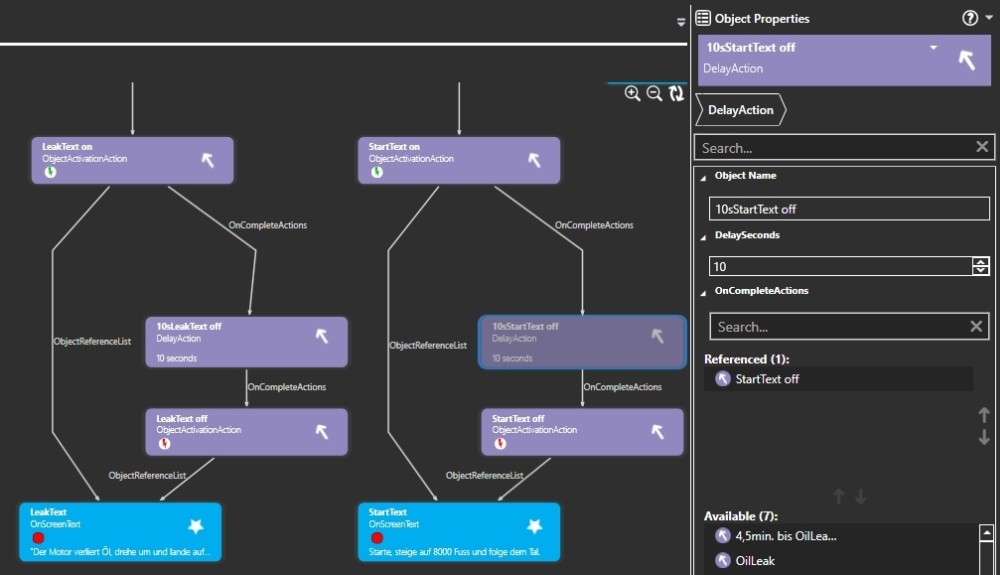
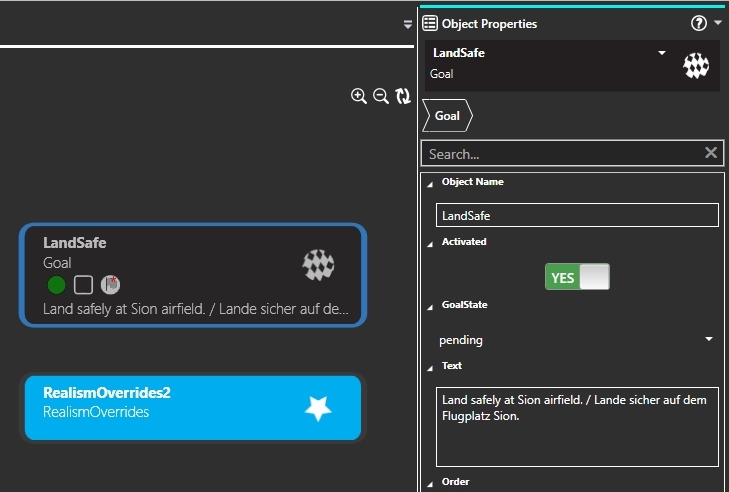
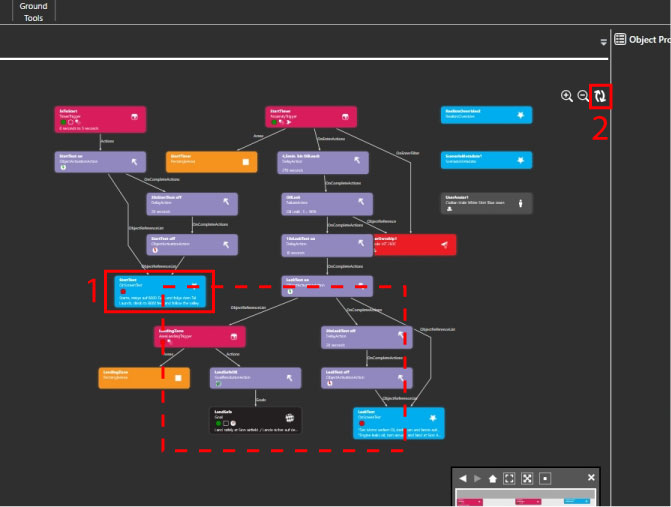
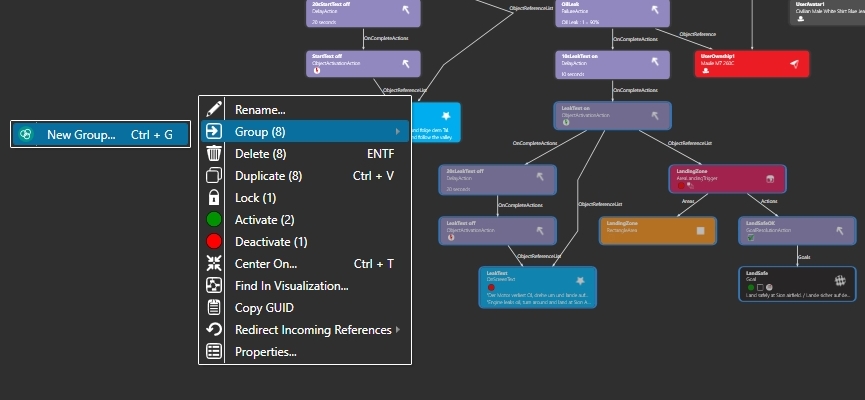
To complete the mission, there are still a few things missing: Let's start with the text: Fortunately, this is quickly created because we already have a good template. In the visualization window, draw a frame around the 4 objects "StartText on", "20sStartText off", "StartText off" and "StartText". Click with the right mouse button and select "Duplicate (4)". Make sure that there is a "4" in brackets behind "Duplicate" to make sure that really 4 objects are duplicated. Now you have 4 new objects, which all have the addition "- Copy 1" in their names. This leak text should be displayed after the oil leak occurs, but not immediately, but with a 10 second delay. For this we need another "DelayAction". Search in the visualization window for the DelayAction" with the name "20sLeakText off" and click on it. Now click with the right mouse button and select "Duplicete (1)". Rename the new action from "20sLeakText off - Copy 1" to "10sLeakText on". For DelaySeconds you enter "10". Next you search for the action "LeakText on" under "OnCompleteAction" and put it into the field "Referenced". This looks like this in the visualization: Now click on the LeakText, because the text in it has to be changed. Remark: Next, you need to link the text to the oil leak so that it fades in at the appropriate moment. So, in the visualization window, find the "FailureAction" (name oil leak) and click on it. In the right window, under "OnCompleteAction", find the action named "10sLeakText on" and put it in the "Referenced" field. Now we take care of the Scenario Goal: Search in the Catalog under Category for "Goals" and drag "Goal" from the window below into the visualization window. Name the goal "LandSafe". In the Text field write: In order for the Goal to be switched as fulfilled on successful landing, you need a "GoalResolutionAction", which can be found in the Catalog under Actions. Drag this into the visualization window and name the action "LandSafeOK". GoalResolution" must be set to "completed". Under the heading "Goals" drag the Goal named "Land Safe" into the field "Referenced". For the evaluation of the Goal we need an "AreaLandingTrigger", which can be found in the Catalog under "Triggers". Under "Actions" find the action named "LandSafeOK" and move it into the "Referenced" field. At "LandigType" (at the bottom) you set "FullStop". If you save the mission now, you will see that there is an error listed in the "Validation Output": "No area definitions referenced therfore landing anywhere counts as a landing." In other words, the "AreaLandingTrigger" needs an Area, which defines that the landing has taken place on the airfield. Therefore we need another Area. Switch the main window to "Prepar3D" and get a "RectangleArea" from the Catalog under Areas into the main window. Name the area "LandingZone" and set "Length", "Width" and "Height" to the correct values, so that the area has exactly the size of the runway (100/2000/50 should fit). Use "Rotate" and "Move" to align the area to the runway. Make sure that "Pitch" and "Bank" are both set to 0, otherwise the area will hang crooked in the air. At "DrawStyle" switch to "None" to make the area invisible. Click on "EDIT" for "AttachedWorldPosition", "YES" for AltitudeAGL and "0" for Altitude, so that the area is perfectly level with the ground. The final result looks like this: Switch to Visualization and click on the "AreaLandingTrigger". Select the "LandingZone" under Areas and move it into the field "Referenced". Now the "AreaLandingTrigger" must be activated at a suitable moment. To do this, search for the action named "LeakText on" in the visualization window and click on it. Slowly the whole thing becomes confusing, a good time to group the components. If this doesn't work, because other objects (1) are in the selection area (dashed), you can use the double arrows in the upper right corner (2), to rearrange the view. Click with the right mouse button and select "Group (8)" and in the appearing menu next to it "NewGroup". Name the group "Leak" (in the right pane Object Properties). If you have clicked on anothe What has changed now? Now leave this group by clicking on "Grouped Graph". Click on this element and you can change the name at Object Properties on the right, give the group a different color and under GroupedObjects you can add or remove elements to the group. By clicking on the symbol at the bottom left of the group, you enter this group (red frame). The only thing missing now is the mission picture and briefing. MissionImage: As mission image I simply used a screenshot of the plane on the runway, cropped it appropriately in an image editor and set an image size of 380x232 pixels. I named the image "MissionImage.jpg". In the loading screen this image is displayed. Briefing: I wrote the briefing in World and saved it as a web page named "ExampleFlight.htm". Incorporate mission picture and briefing: In the P3d storage directory (by default "C:\Users\USERNAME\Documents\Prepar3D v6 Files") create a new folder named "ExampleFlight". Now you have to link the two files to the mission. That was all. Save the mission, quit SimDirector, start Prepar3D and enjoy the flight. With a little experience, you can click this little mission together in well under an hour. If you have read this tutorial but don't want to rebuild it and still want to see the result, you can download this zip and copy the files it contains (3 files 1 folder) into your save directory. I hope this tutorial was understandable. Now have fun creating your own missions. |
|
|
Continue to build the mission: Example Expand Flight (Part1)
|
|
|
I hope you enjoy these flights, if so, please give feedback to p3d@andi20.ch. Also send error messages (spelling mistakes, wrong information, etc.) to me, I appreciate any feedback. |
|
| Introduction | FlightCreate | MissionCreate | MissionExpand | MissionComplete ||||| MissionExpand 1 | 2 | 3 | 4 | 5 | 6 |
Introduction | Why | Missions | Tutorial | FIP | Once







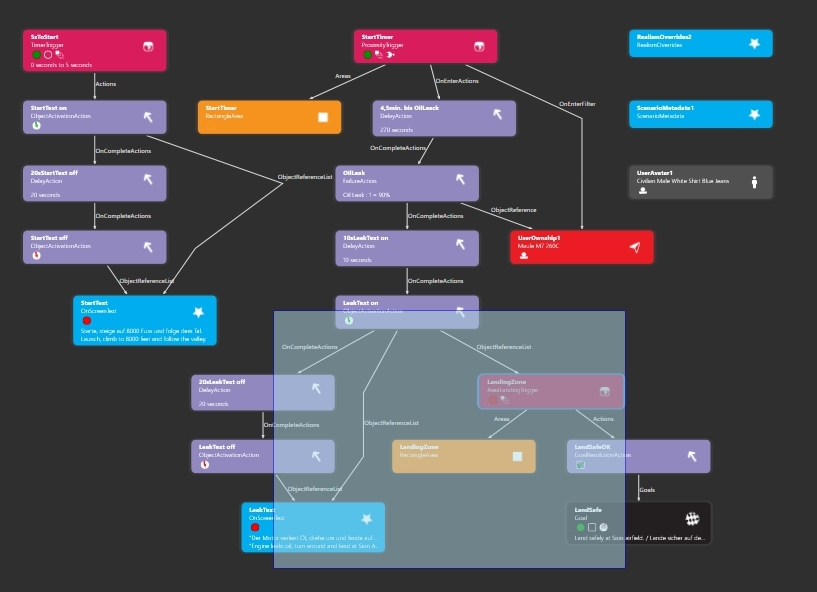
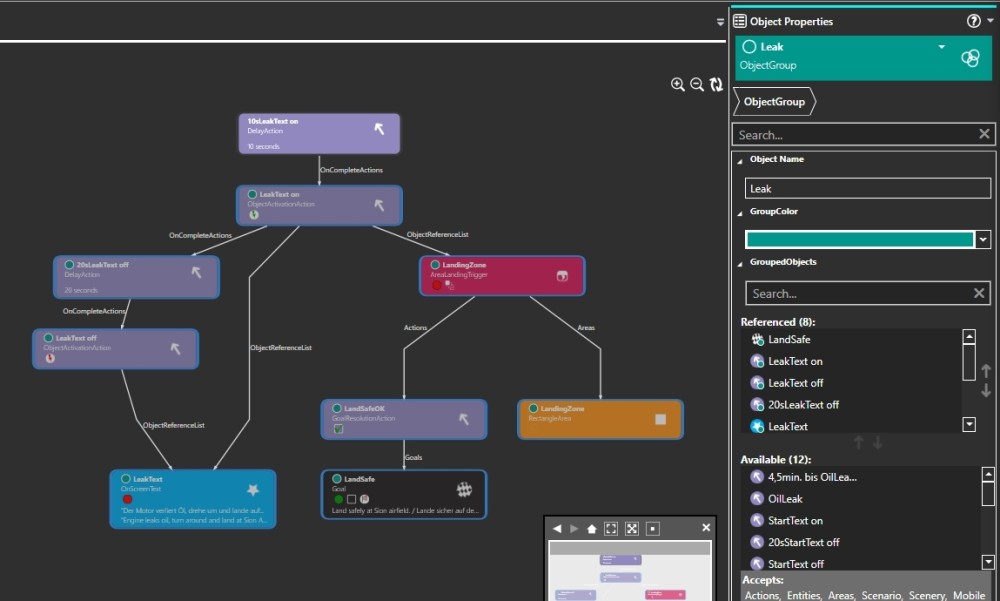 r object within the group, you cannot rename the group currently. You have to leave the group and select the group there to rename it, more about that below.
