Introduction | Why | Missions | Tutorial | FIP | Once | Memory | More
|
|
|
| Example flight expand (Part1)
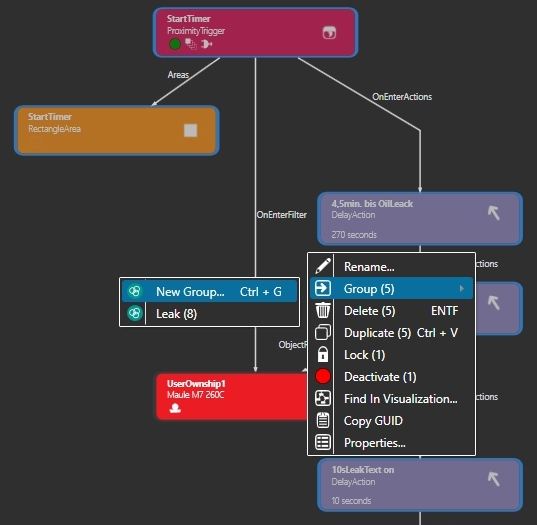
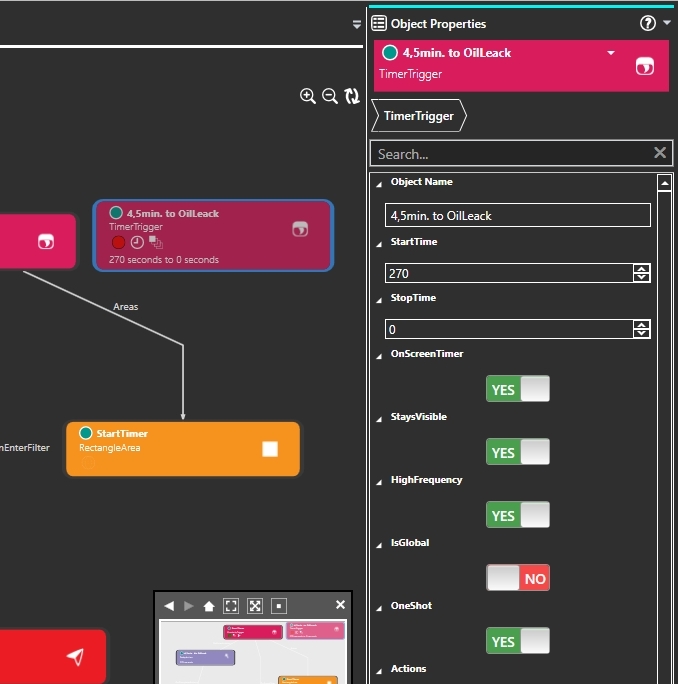
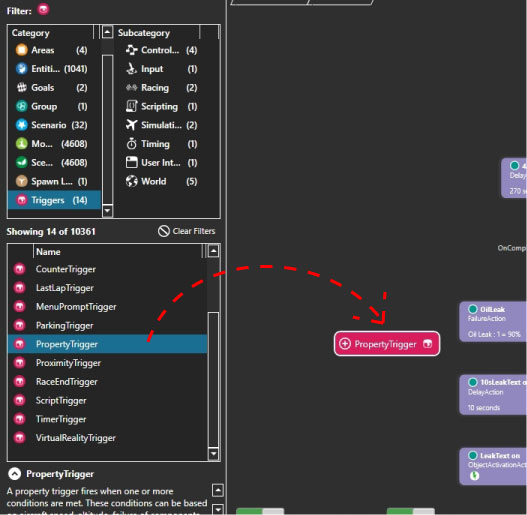
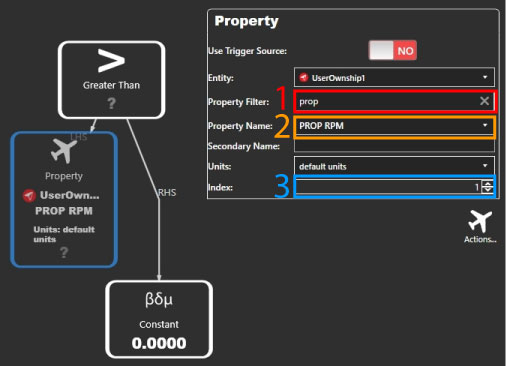
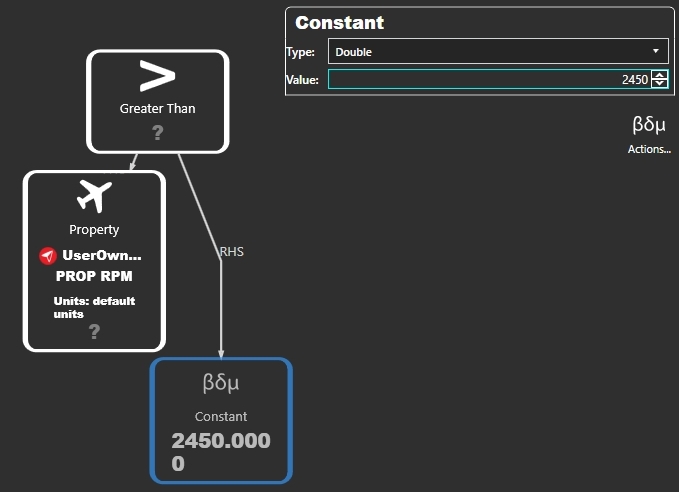
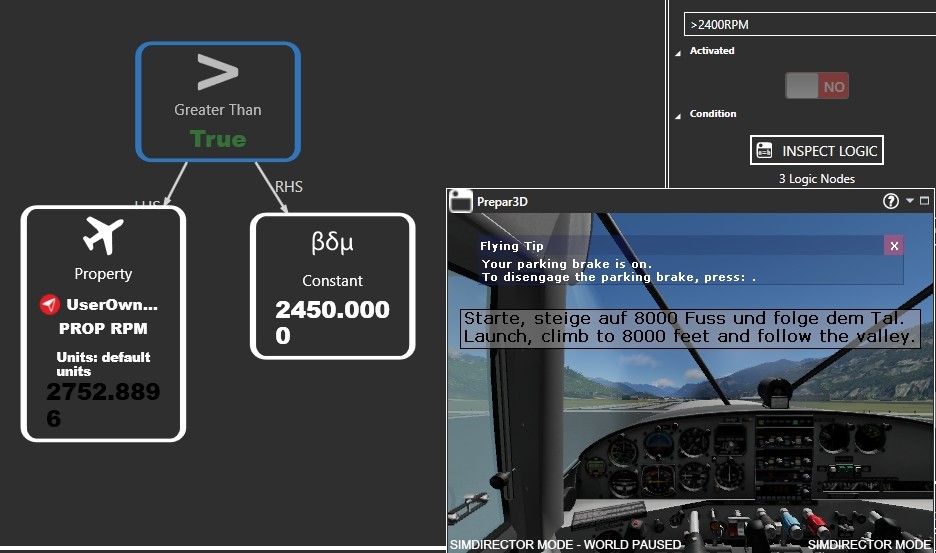
Welcome to the 1st part of this example flight expansion. Actually, with the introduction so far, you can easily build your first small mission. Because I taught myself everything, I was looking for a solution to some problems for weeks. First a basic explanation about missions: This was hard to understand for me as a beginner in mission creation at that time. I tried to analyze existing missions to determine the "starting point" of this mission. Conclusion: There is no clearly defined starting point, as with a book that begins on page 1. By the way, a fixed mission end is only present if Goals are present in the mission. As soon as all Goals have been evaluated as "fulfilled", a window pops up with the text "Mission fulfilled". To explain other functions in SimDirector, let's extend the example flight. Let's assume that the Maule is already very old and has many thousands of flying hours under its belt. Therefore the engine must be treated gently. So let's build that into the mission. Open the SimDirector and load the ExampleFlight. For a better overview we create a new group. Switch the main display to "Visualization" and draw a frame around the 5 objects shown in the picture (or click on the objects while holding down the "ctrl" key). Right click, select Group (5) / New Group. Name the new group "TimerFailure". Leave the group by clicking on "Grouped Graph" and you will see that the overview is even tidier. Open the group "TimerFailure" again by clicking on the symbol at the bottom left of the group (red circle). The now existing DelayAction (4,5min. to OilLeack) is not suitable for the planned extension, because the action, once activated, runs the set 270 seconds and starts the oil leak. Stopping it is not possible. So we need a TimeTrigger instead. Search for "TimeTrigger" in the Catalog under Triggers and drag it into the visualization window. If you wonder why I didn't use a TimeTrigger from the beginning: But now let's continue with the TimeTrigger: Name the trigger "4,5min. to OilLeak". Set "StartTime" to 270 and "StopTime" to 0. Set "OnScreenTimer" to YES, so you can check during the test flight if the timer does what it is supposed to do. At "Activated" at the bottom switch to NO, the trigger gets a red dot. Next you need a "PropertyTrigger". Search for it in the catalog under Triggers and drag it into the visualization window. A PropertyTrigger can evaluate different things, e.g. the speed, the altitude, or the flap position of the aircraft. In this case we will evaluate and monitor the RPM of the propeller. Name the trigger at Object Name ">2400RPM". At Activated switch to NO. Now we have to create a logic, click on "EDIT LOGIC". The main area now has a new tab "Conditional Logic". Click on "Create Logical Expression Tree". Right-click on the newly created "And" and select "Greater Than" (red rectangle) from the "Change Type" menu. Under "Greater Than" 2 new objects have been created, which have to be filled with values. Right-click on the left object and select "Property" (red rectangle) from the "Change Type" menu. On the right you have to select "PROP RPM" for Property Name. The list is very long, therefore: "1" means, the RPM of motor 1 is evaluated, with multi-motor machines, with index 1-4, the RPM of each individual motor can be evaluated.
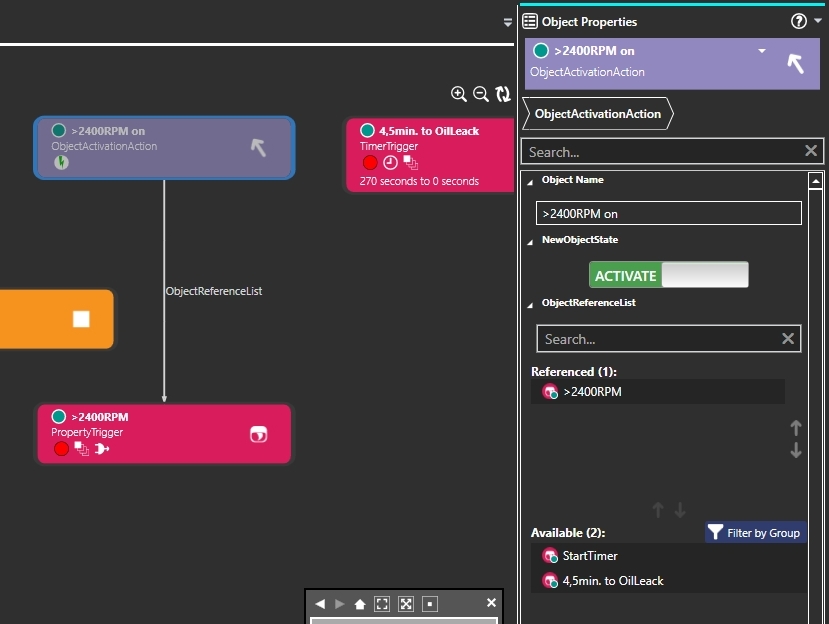
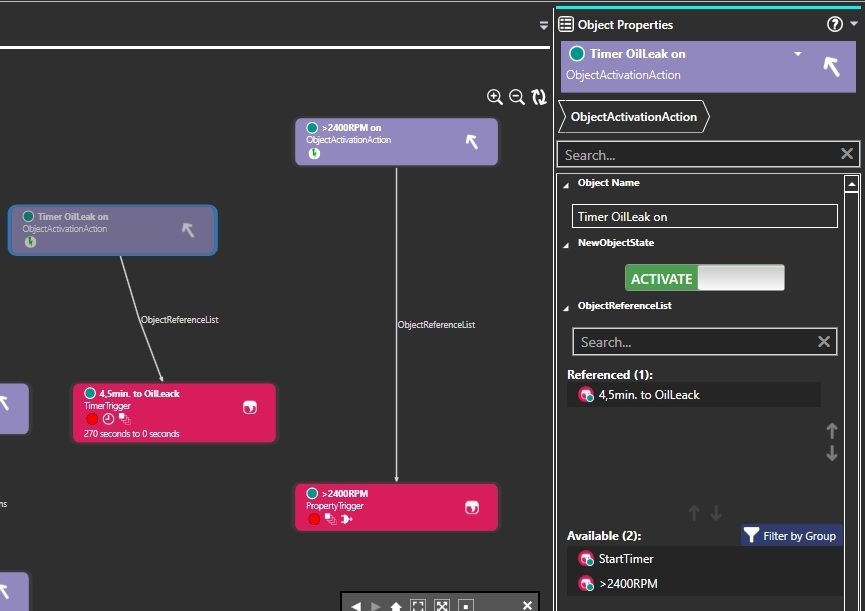
TimeTrigger and PropertyTrigger must now be linked. An ObjectActivationAction is needed. You can search for it in the catalog under Actions, or simply duplicate the existing action named "LeakText on" in the visualization window. Name the action ">2400RPM on", NewObjectState must be set to ACTIVATE, under ObjectReferenceList bring the trigger ">2400RPM" into the field "Referenced". Duplicate the ObjectActivationAction "LeakText on" and name the duplicate "Timer OilLeak on". NewObjectState is set to ACTIVATE, now bring the trigger "4,5min. to OilLeack", under ObjectReferenceList into the field "Referenced". Click on the PropertyTrigger ">2400RPM" and bring the ObjectActivationAction "Timer OilLeak on" into the field Referenced under Actions. Set OneShot to NO, which means that the trigger can be triggered multiple times (red frame). The 4 new objects still have to be integrated into the mission: Click on "StartTimer" and under OnEnterActions bring the ObjectActivationAction named ">2400RPM on" into the Referenced field. Klicke den TimeTrigger namens "4,5min. to OilLeack" an und bringe unter Actions die FailureAction namens "OilLeak" in das Feld Referenced. Als Letztes muss noch die DelayAction namens "4,5min. bis Öl-Leck" entfernt werden. Mit linker Maustaste anklicken, dann mit rechter Maustaste klicken und im Menü Delete wählen. Mission speichern, wenn alles richtig gemacht wurde, ist bei Validation Output kein Fehler mehr gelistet. Nun probieren wir eine weitere Funktion des SimDirector: "Preview Scenario" Anstatt den SimDirector beenden, Flug im Prepar3D starten und testen, dabei nicht wissen, warum eine Funktion nicht funktioniert, testen wir gleich im SimDirector. Das hat den Vorteil, dass man nebenbei beobachten kann, wann welche Action, ausgelöst wird und im Falle des ">2400RPM"-Trigger kann man in der Logic genau sehen, welche RPM-Werte aktuell gemessen werden. Vorher solltest du aber unbedingt speichern. Der P3d stürzt zwar äusserst selten ab, aber genau bei dieser "Preview Scenario"-Funktion, kann es durchaus zu einem Programmabsturz kommen. 1) Click on "Mode" in the upper menu band. 2) Click on "Preview Scenario". 3) Confirm the question "EnterPreviewmode?" with Yes. Since we mainly want to see what the PropertyTrigger ">2400RPM" evaluates, the "Conditional Logic must be visible next to the Prepar3D window. So drag and drop the Prepar3D lash into the main area. You now see the evaluation of the trigger: On the left your aircraft with currently measured propeller RPM, on the right at Constant the set value. Above the evaluation "Greater Than" with the value "False" (less than 2450RPM). Click into the Prepar3D window and press "P" to deactivate the pause mode. Alternatively you can use the controls on the top right (Play, Change simulation rate, use the double arrows to restart the simulation). Give full thrust, the RPM will go up to 2700RPM and at "GreaterThan" "False" will change to "True". So the trigger evaluates correctly and will activate the timer for the oil leak. Switch to the editing mode by clicking on "Mode", Sim Editor. All the effort that has been done here brings the same result in flight as before, with the DelayAction. As usual: If you don't want to rebuild this tutorial yourself, you can download this zip and copy the files it contains into your storage directory to see the result. |
|
|
Continue with part2: Example flight expand (Part2)
|
|
|
I hope you enjoy these flights, if so, please give feedback to p3d@andi20.ch. Also send error messages (spelling mistakes, wrong information, etc.) to me, I appreciate any feedback. |
|
| Introduction | FlightCreate | MissionCreate | MissionExpand | MissionComplete ||||| MissionExpand 1 | 2 | 3 | 4 | 5 | 6 |


Introduction | Why | Missions | Tutorial | FIP | Once | Memory | More