Klick hier für Seite auf Deutsch
Missions (Scenarios) for P3D
Introduction | Why | Missions | Tutorial | FIP | Once | Memory | More
|
Statistics | Notes | ManufacturingNewYorkBridges
|
|||
|
|
|||
| If you are interested in how to create such a mission, I will explain it using the NewYorkBridges mission as an example. | |||
|
I don't really know how to create a mission, but here's my method: Learning by doing. |
|||
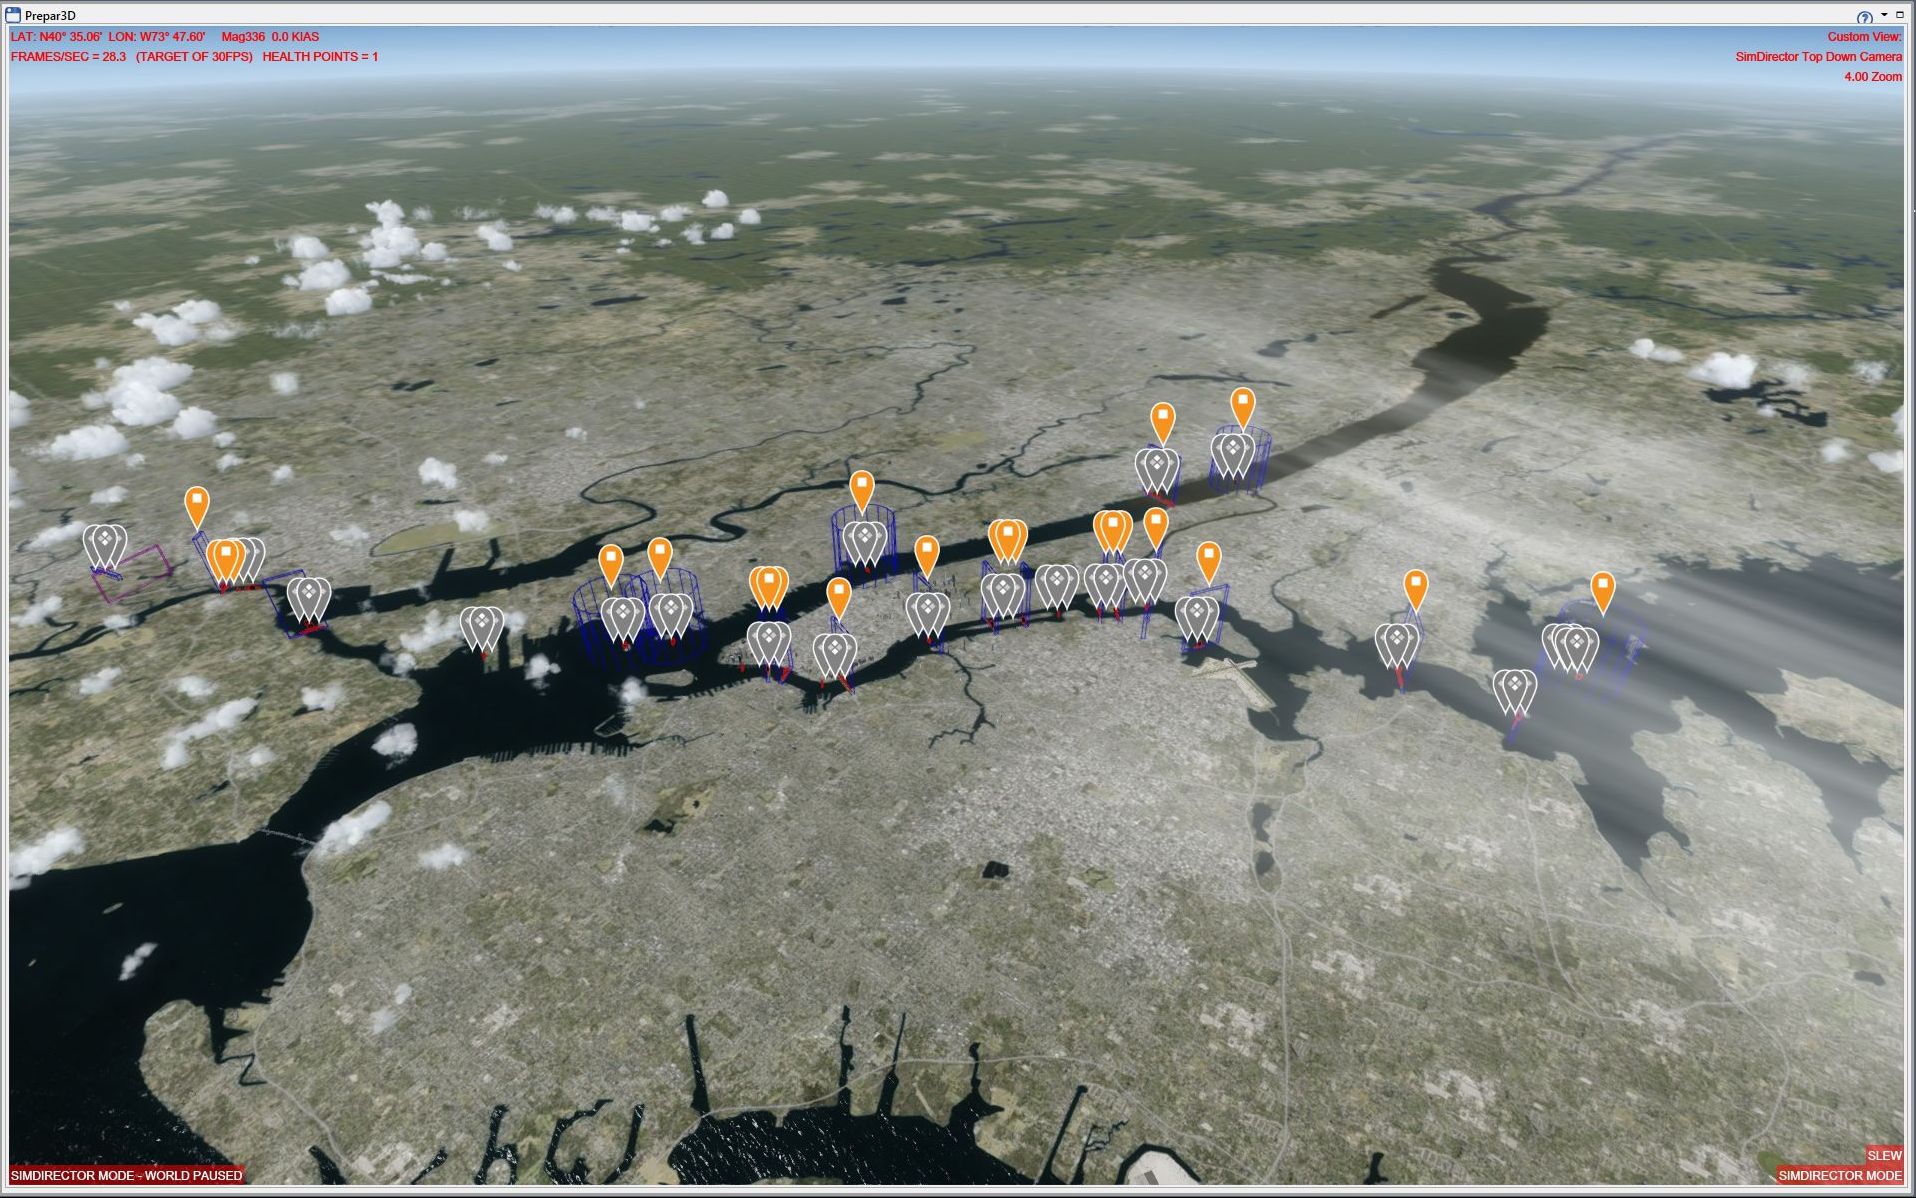
| 1. have an idea for a flight and then create a flight route in GPS (in normal P3D).
Idea here was a small sightseeing flight around NY. I noticed a lot of bridges and thought, why not fly under them? Now open the SimDirector and there the flight just created in P3D. Click on the pictures for a larger view. |
 |
Flight Planner Overview.
WP1 selected, click on Edit on the far right... |
|
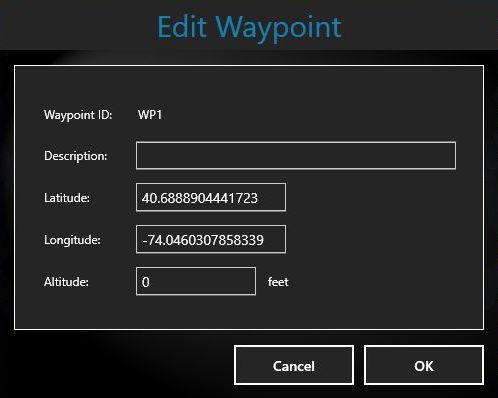 |
...and copy the Latitude/Longitude coordinates and save them in a file.
Repeat the process for all waypoints. |
||
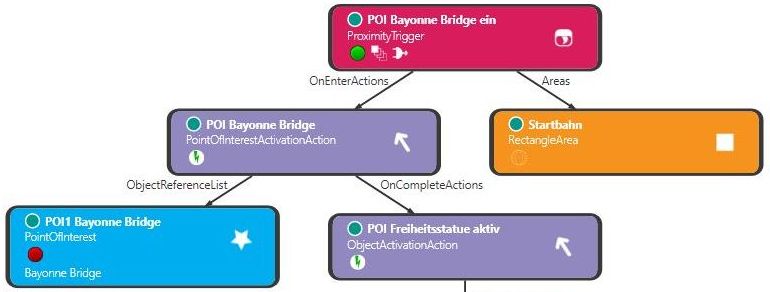
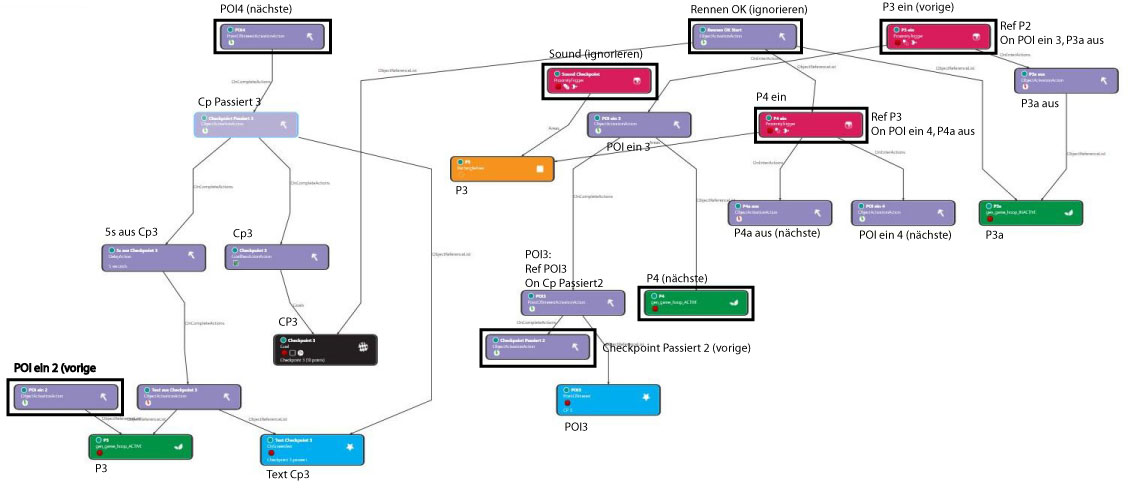
| For all of you who think it's easy to make something like this, here's an example: - To activate a bridge, you have to define an area (here orange), through which the plane will probably fly. - A trigger (red) monitors if the plane enters the zone (orange) and triggers... - triggers the POI-Activator (purple above), which directs the mission compass to the next defined target (blue) and activates the next trigger (purple below). Here are only 5 required parts, because this is about the simplest thing you can do. |
 |
||
| 2. define the 13 bridges as POI and link them (they will be displayed in the mission compass):
2.1 Logically link a bridge: Click on the image for a larger view. |
 |
||
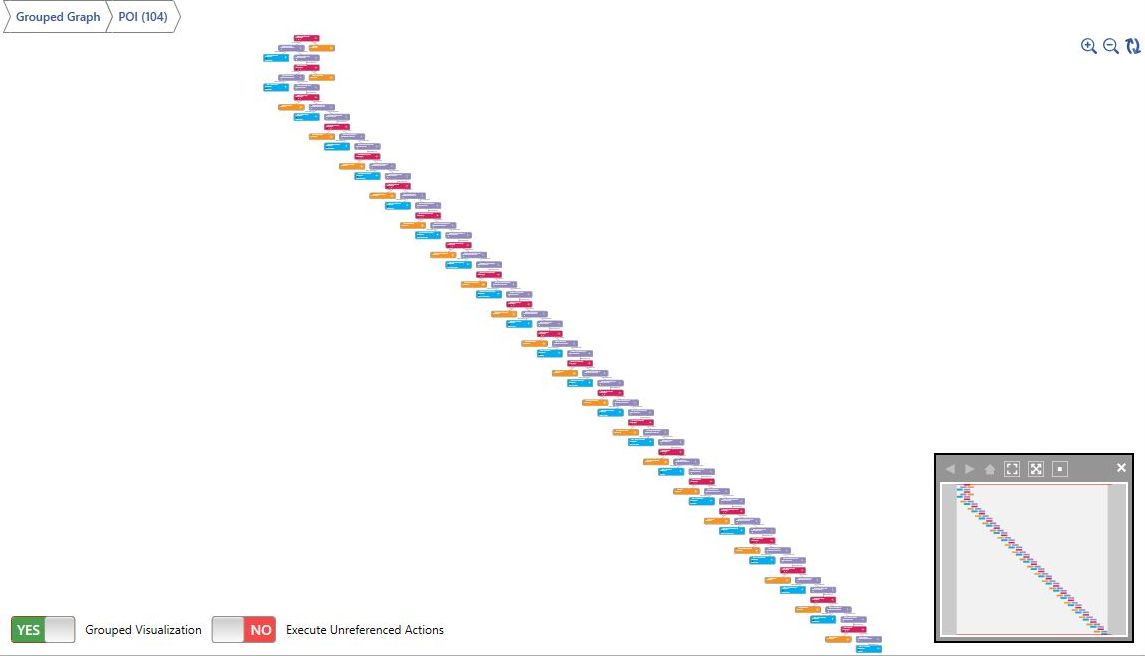
| 2.2 Then copy this 12 times, adjust texts and connect bridge 1 with 2, with, 3, etc. at the end. | 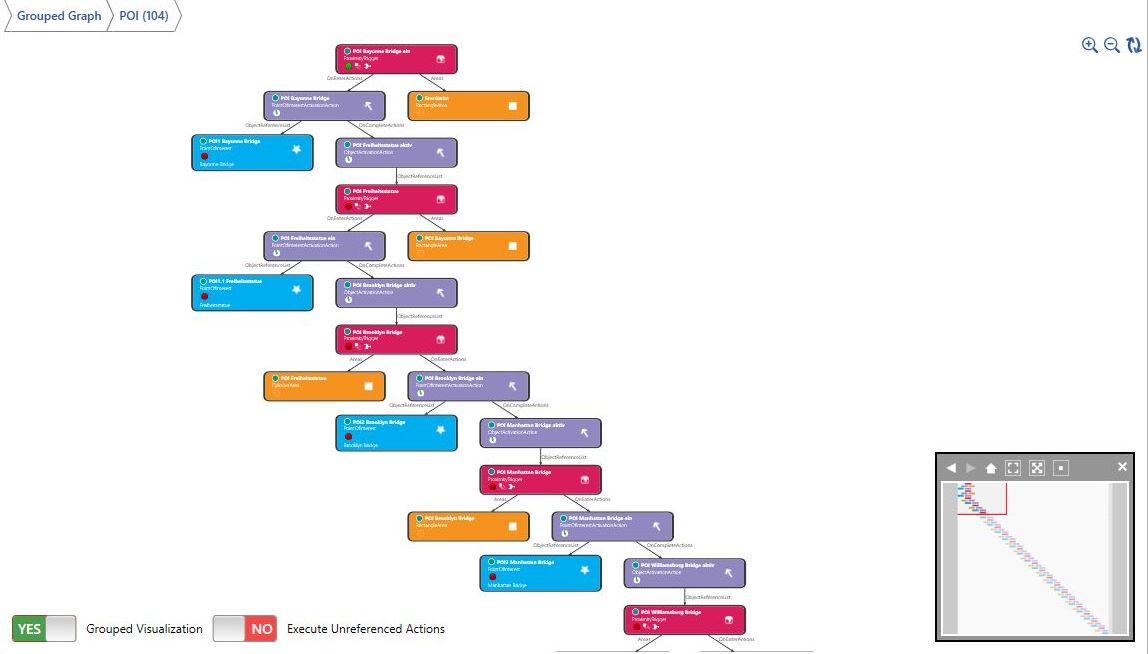 |
This is how it looks finished. Pure concentration and hard work, after all, 104 parts want to be linked correctly. |
 |
| 3 Install crash logic: 3.1 Tinker logic to this bridge. |
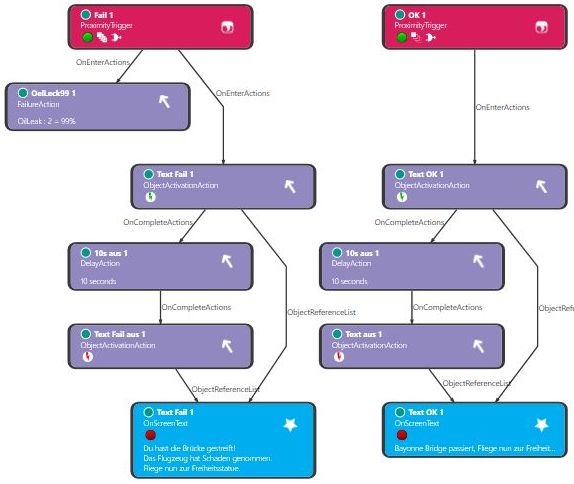 |
3.2 Install Goals. | 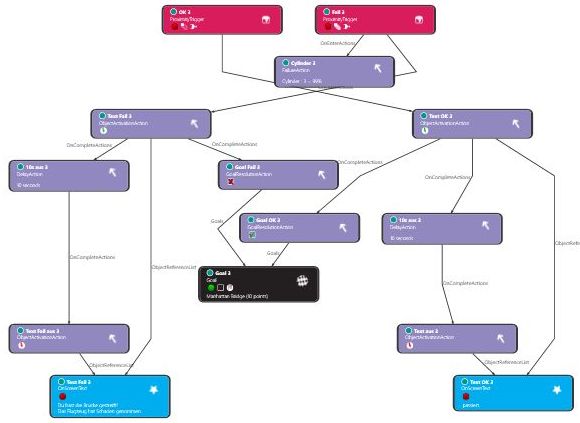 |
| 3.3 Copy logic 12x and name accordingly. | 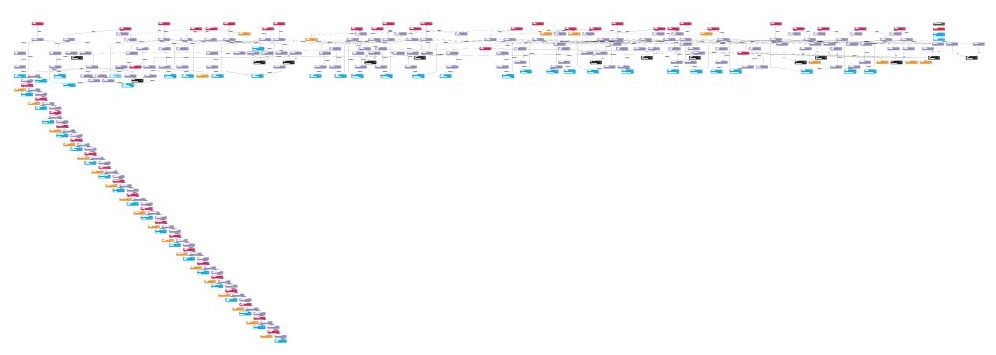 |
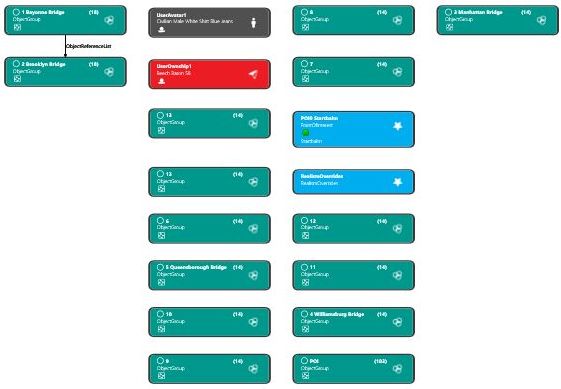
Hopefully you have the 13 bridges sorted into groups?
Then it looks something like this: |
 |
| 3.4 Set appropriate areas for each bridge and link them to the logics. | 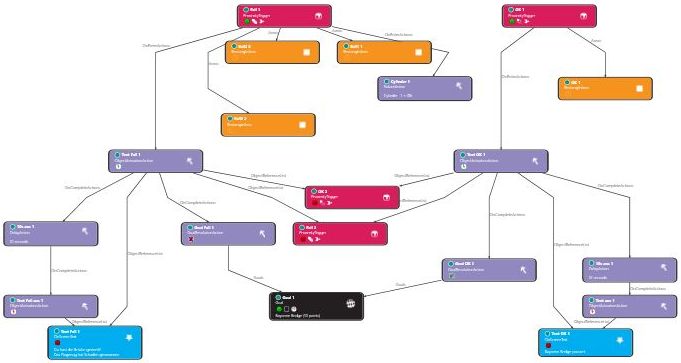 |
13x linked looks like this: I hope you have a good magnifying glass, because by now everything is so small, after all there are already 375 objects. |
 |
| 4. link bridges together, add logic for Goals and the mission is done!
In this case there are about 400 parts (triggers, actions, areas, etc.) that were used. |
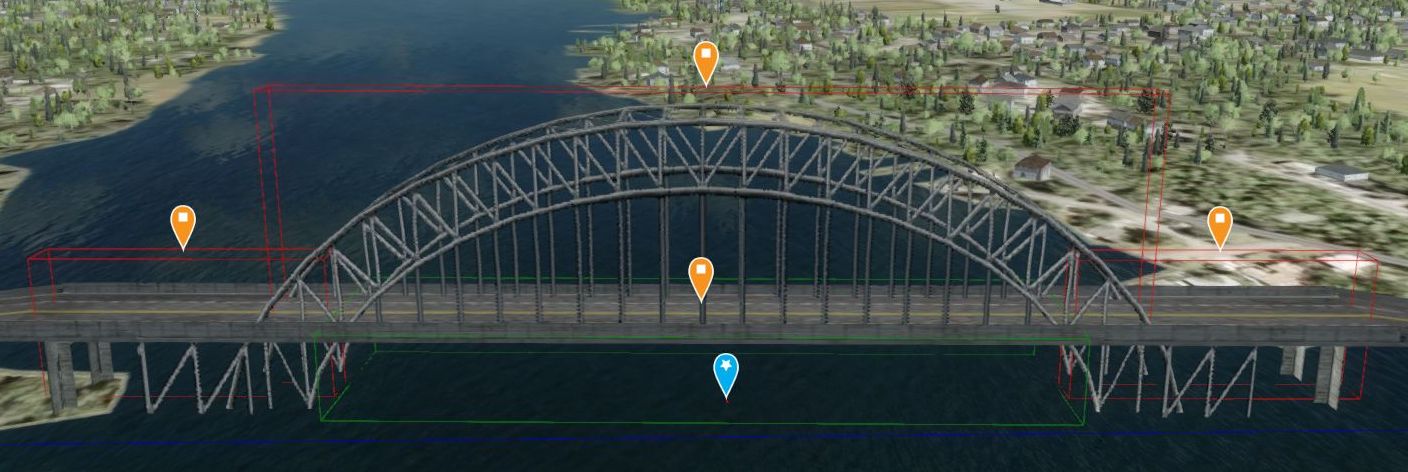
By the way, the areas of a bridge look like this: Green rectangle is the area that must be flown through. At the red rectangles the plane takes damage. |
 |
|
| 5. that's it? No!
After I finished the mission, I had the idea that you could also fly this round on time with a fighter jet, or other machines. |
|||
| 6. again set triggers, POI's and areas, link them together and create suitable logics.
Sounds simple, but it is not: The problem: Although I package everything into groups, cross-group links will always be necessary: Group 2 is started by Group 1 and Group 2 also starts parts in Group 3, etc. I couldn't figure this out in my head, so I made up an auxiliary graphic that I applied 20 times. |
 |
||
| 7. add a timer at the end, tinker with the choice between different planes, and poof, there are 748 parts in this one mission.
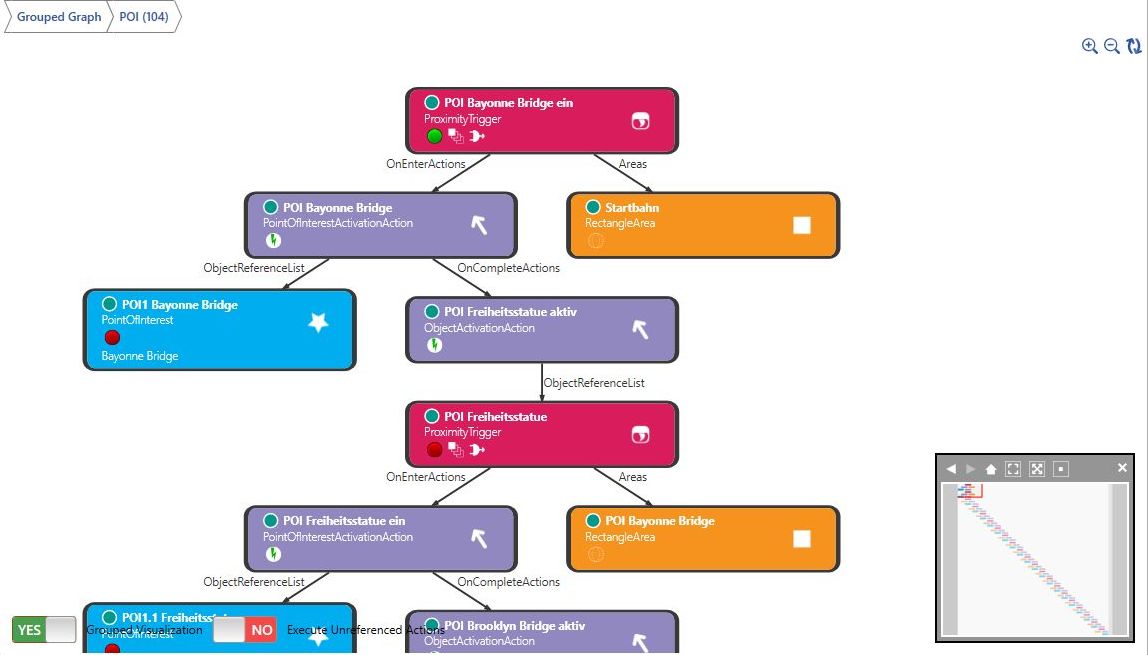
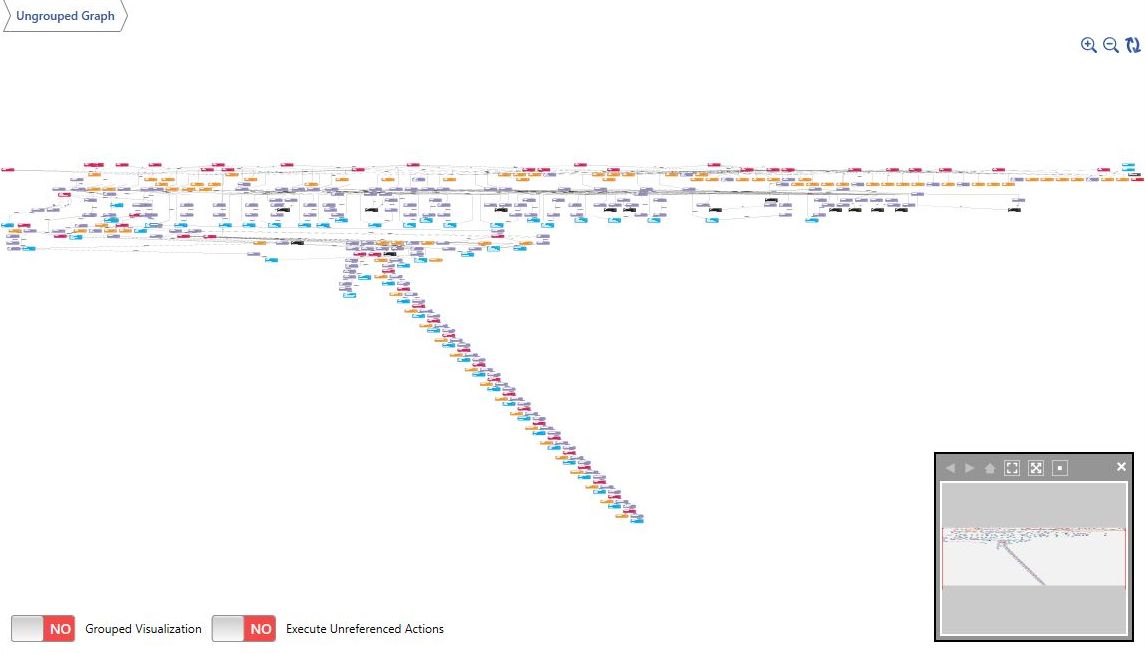
The group overview alone looks complex. |
 |
Not to mention the overview without group display. |  |
| Admittedly, the Mision offers a lot:
- Comfortable sightseeing flight (beginner mode) - Flying under bridges (without danger) - Flying under bridges (with damage, in case of collision) - Race (with different airplanes) |
Mentioned in passing:
The representation of the shortcuts is displayed differently every time. There are beautiful and terrible representations. |
Here as an example 2 pictures of the same situation: |
|
Beautiful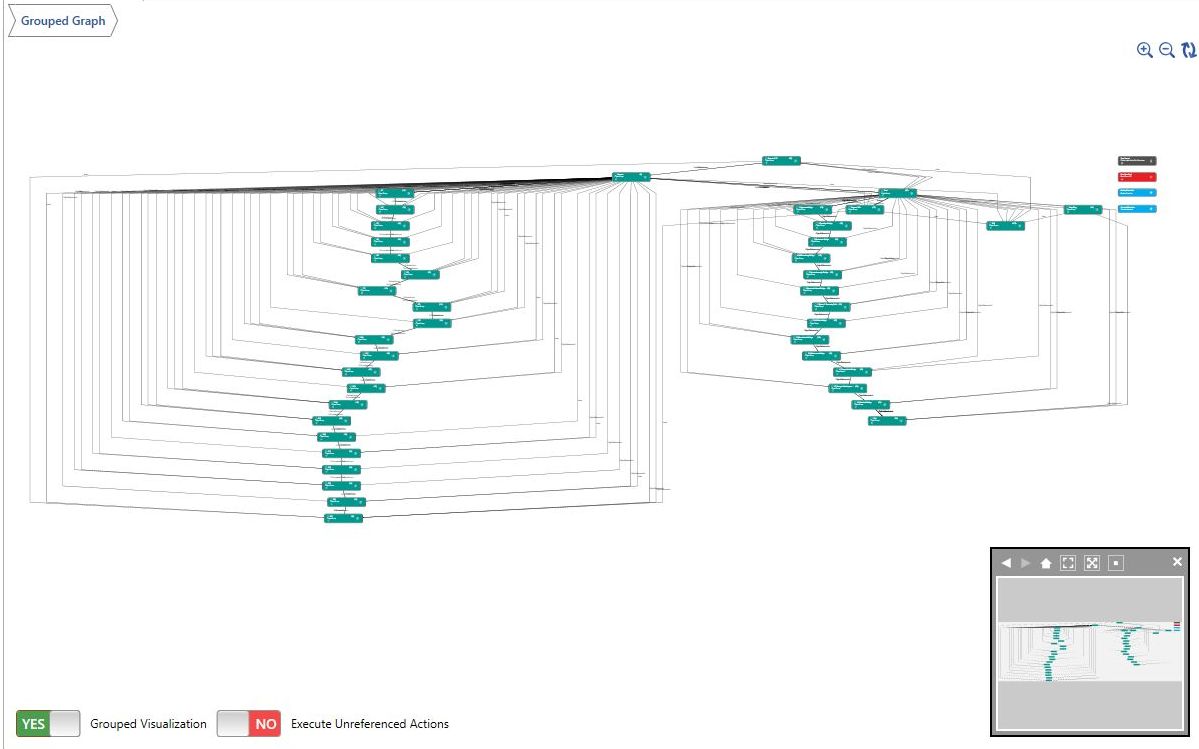 |
Bad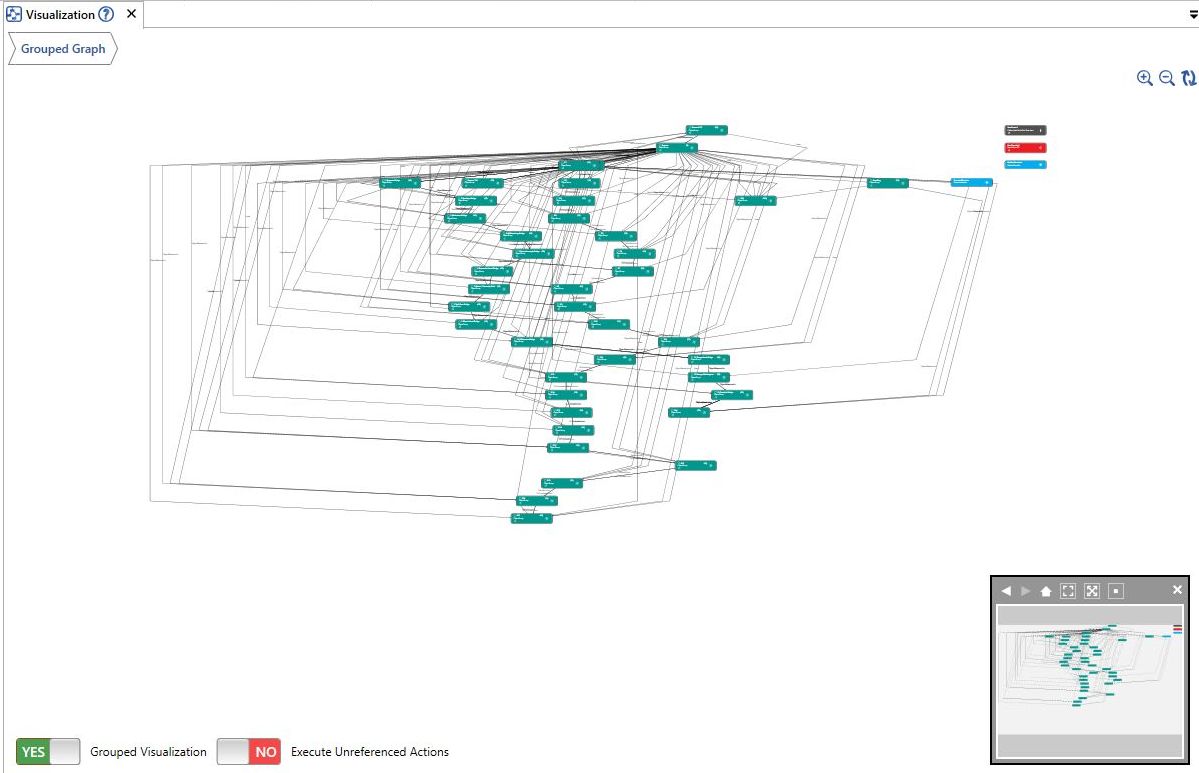 |
||
|
You can recalculate the display by clicking on the icon in the upper right corner (the 2 arrows). |
|||
| After 3-4 clicks it looks pretty.
However, experience has shown me that something is still not quite right in the mission. At least with smaller groups (up to 10 parts) it was always so: From then on the group was displayed exactly the same every time, at the latest after the 3rd click the "optimal display" is reached, from then on further clicking does not bring a new display. Even with 20 groups, the group view was always displayed differently until I had eliminated the last (really unimportant small) error. By the way, this is not only the case for the group view, also the single parts in a group are displayed differently every time, until the last small error is fixed. I'm still looking for a while for the error, I'm sure I'll find it! I can ignore something so unimportant, because an already activated trigger reactivates nothing. But my ambition wants an error-free mission. |
|||
| I made a test flight and some things did not work as planned.
- I have tested all bridges for underfly - suitability, but strangely crash`t the plane at over 210 Kias, with 180 it works fine. - I don't like the checkpoints... - ...and the POI markers (the compass arrows that mark the next destination) are too low. So rebuild everything, put checkpoints over the bridges, redefine gates, put in additional gates, put gates in red/green, relink everything, etc. I had to create an auxiliary graphic again, because by now even a single gate is linked in such a complex way that you can't keep track of it in your head anymore. |
 |
||
| After the additional checkpoints are inserted:
Test flight, fix last bugs and add introductory texts and pictures. 886 objects! Who can still keep track of them? |
Finished the flight looks like this: | ||
Grouped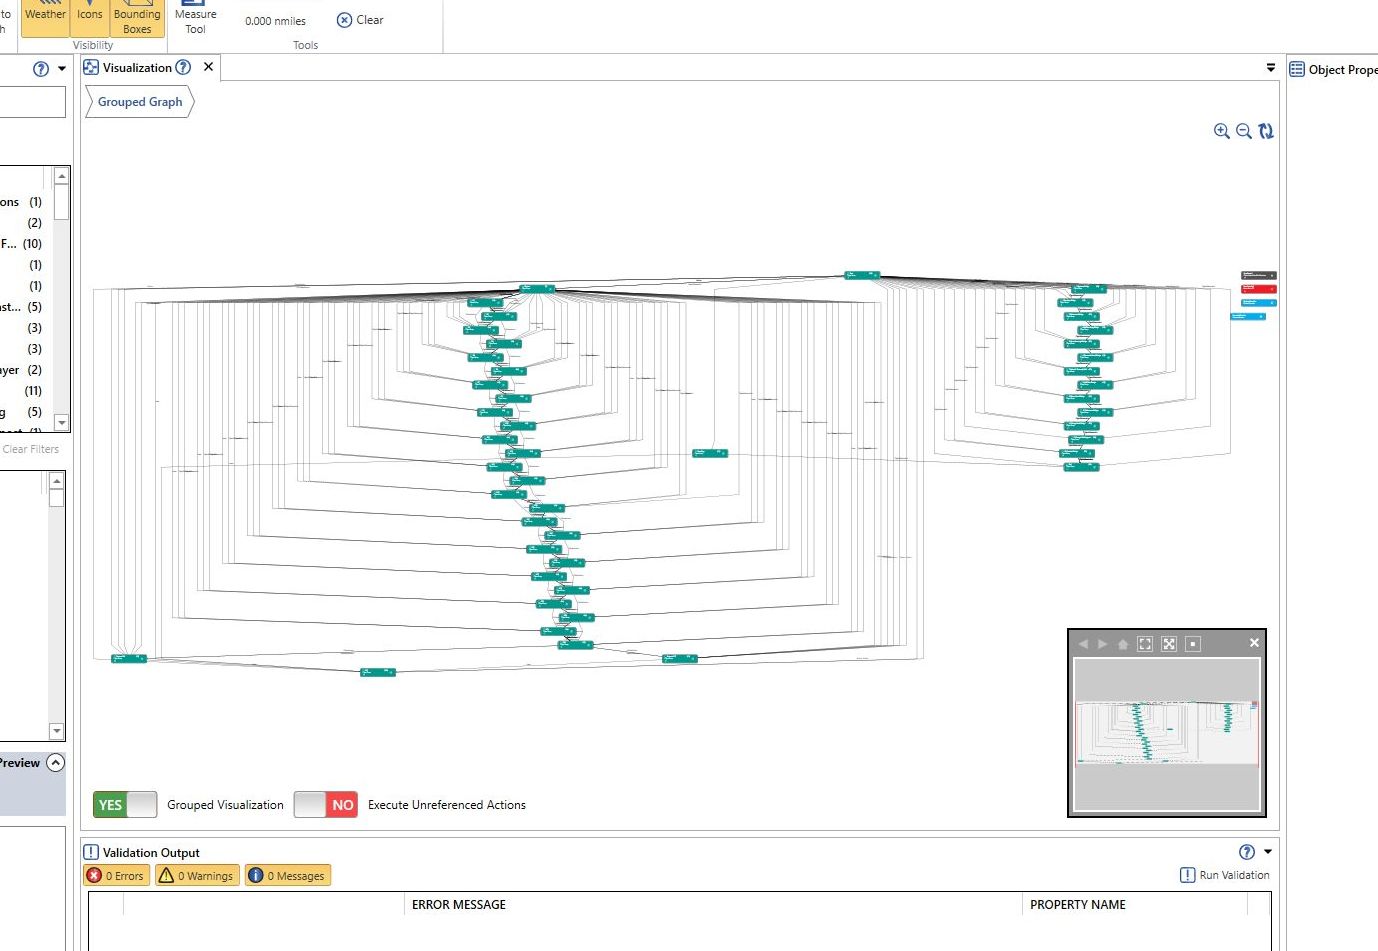 |
Not grouped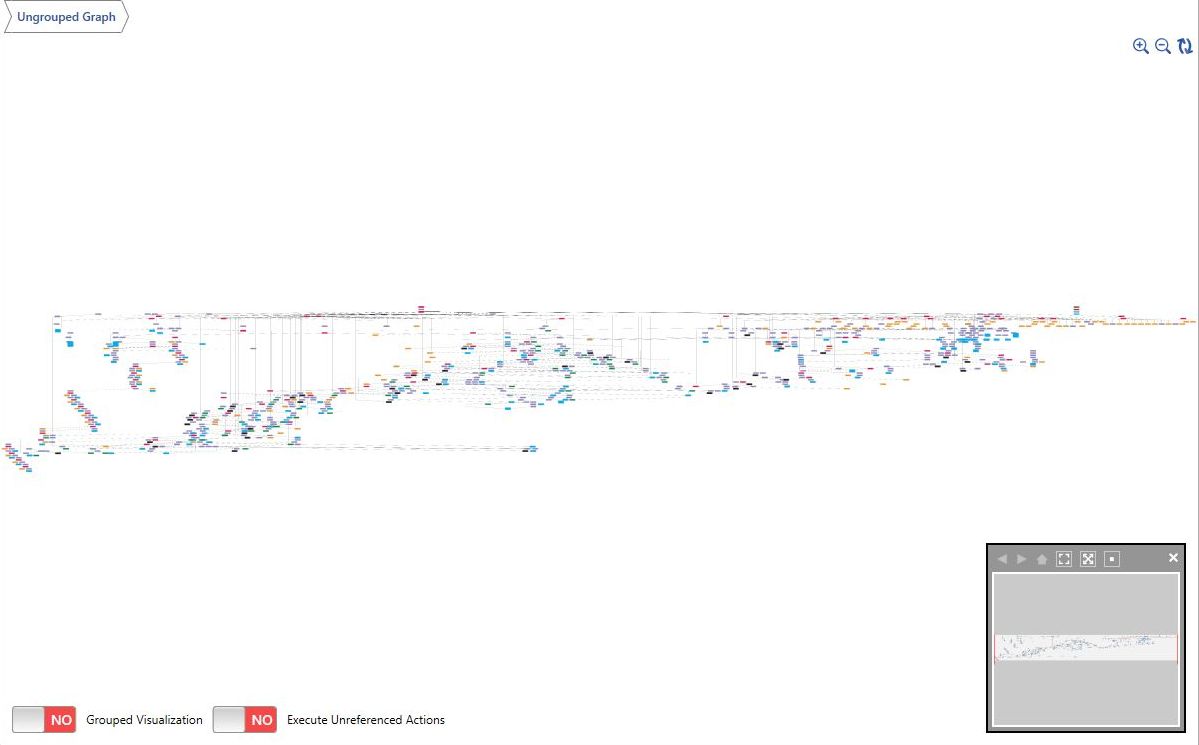 |
||
| This is how the visualization of the finished flight looks like.
Click on the image for a larger view. |
 |
||
|
I hope you enjoy these flights, if so, please give feedback to p3d@andi20.ch. Also send error messages (spelling mistakes, wrong information, etc.) to me, I appreciate any feedback. |
|||
| Statistics | Notes | ManufacturingNewYorkBridges | |||
Introduction | Why | Missions | Tutorial | FIP | Once | Memory | More